Table of Contents
Introduction
Odoo is an open-source business management software that includes a range of business applications for various needs, such as CRM, e-commerce, accounting, inventory, project management, and more. In this guide, we will walk you through the steps to set up Odoo on MacOS with Apple Silicon (M1, M1 Pro, M1 Max, M2) processors.
Prerequisites
Before you start setting up Odoo on MacOS with Apple Silicon, ensure you have the following:
- MacOS with Apple Silicon (M*) processor
- Homebrew installed on your MacOS Homebrew
- Python 3.8 or higher installed on your MacOS
- Node.js installed on your MacOS
- PostgreSQL installed on your MacOS (Tip: you can use DBngin to install PostgreSQL) DBngin
Installation Steps
🐍 Step 1: Install Python
To install Python on your MacOS with Apple Silicon, use Homebrew. Open your terminal and run the following command:
brew install [email protected]🌐 Step 2: Install Node.js
To install Node.js on your MacOS with Apple Silicon, use Homebrew. Open your terminal and run the following command:
brew install node🐍 Step 3: Set Up a Python Virtual Environment
Setting up a virtual environment helps to manage dependencies and avoid conflicts. Run the following commands to create and activate a virtual environment:
python3 -m venv odoo-env
source odoo-env/bin/activate
📦 Step 4: Install Required Python Packages
After activating the virtual environment, install the required Python packages. Since the psycopg2 package is not supported on Apple Silicon, replace it with psycopg2-binary and comment out the psycopg2 package in the requirements.txt file. Then run:
pip install -r requirements.txt📝 Step 5: Create a Configuration File
Create a configuration file for Odoo with extension .conf and add the following configuration:
[options]
; Server Settings
addons_path = *path_to_your_addons*
data_dir = *path_to_your_data_dir*

; HTTP Service
http_port = 8069 ; Port for HTTP service
longpolling_port = 8072 ; Port for longpolling service

; Database Configuration
db_host = 127.0.0.1 ; Database host
db_port = 5432 ; Database port
db_user = *your_db_user*
db_password = *your_db_password*
db_name = *your_db_name*
🚀 Step 6: Start Odoo Server
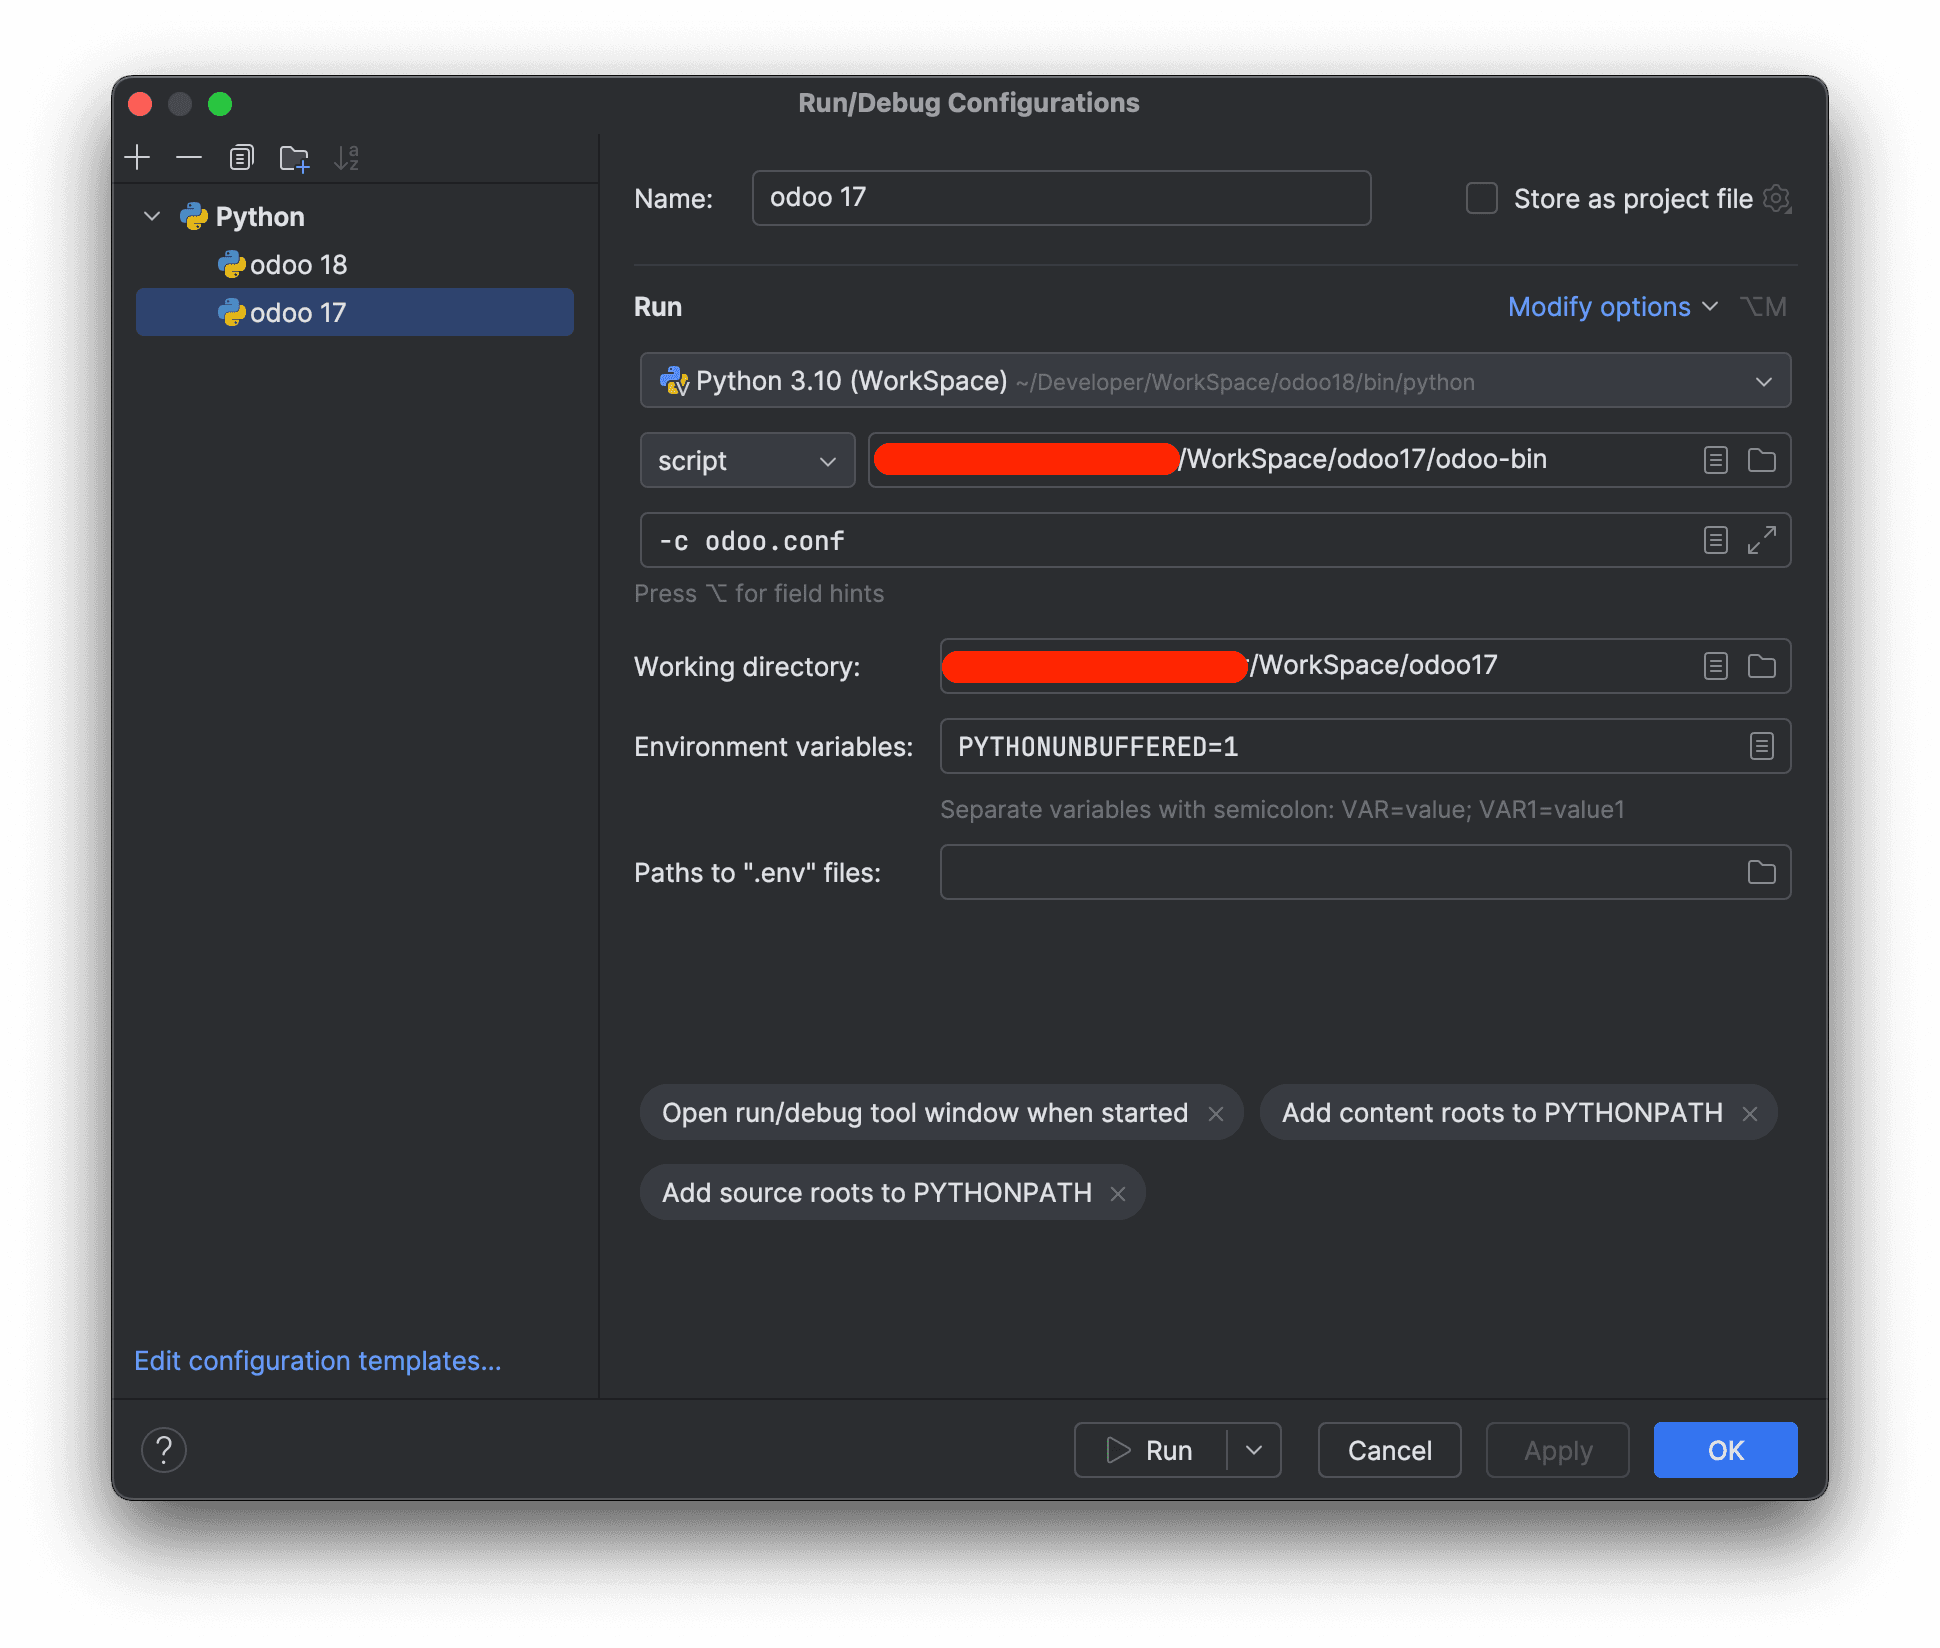
If you’re using PyCharm, you can create a new configuration and add the following script to start the Odoo server:

or you can run the following command in your terminal:
python odoo-bin -c /path/to/your/configuration/file.conf